Configuring Printer Profiles in ScrewDrivers v7
Overview
Printer profiles in ScrewDrivers v7 allow you to pre-configure printer settings like duplex printing, color mode, paper size, and other driver-specific options. Instead of requiring users to manually configure each printer, profiles apply standardized settings automatically when printers are created in user sessions.
This guide covers three methods for creating and assigning printer profiles:
- Administrator-created profiles via ScrewDrivers Printer Discovery
- Profile assignment through ScrewDrivers Administration console
- End-user created profiles via ScrewDrivers Printers applet
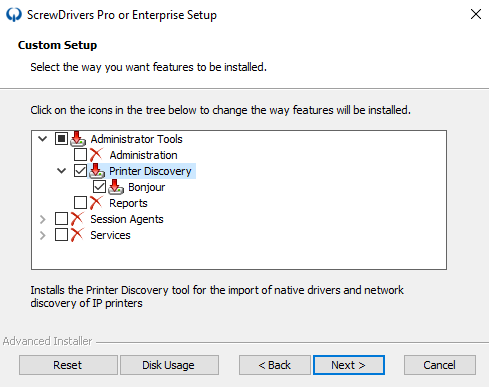
To display native driver interfaces for profile configuration, Tricerat Advanced Print Features must be enabled on your system.
Prerequisites and Setup
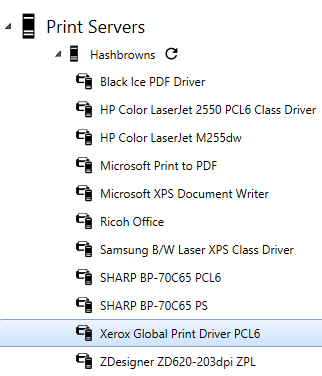
Print Server/Driver Repository
Before creating printer profiles, you need ScrewDrivers Printer Discovery installed on a system where your print drivers are already installed. This allows ScrewDrivers to:
- Import print drivers into the database
- Deploy drivers where printers will be built
- Access native driver configuration interfaces
The Driver Repository is typically installed on:
- Your primary Print Server
- A dedicated driver management server
- The ScrewDrivers Administration server
Method 1: Creating Profiles via ScrewDrivers Printer Discovery
This method allows administrators to create standardized profiles that can be assigned to printers, Active Directory objects, or custom owners.
Step 1: Open Printer Discovery Application
Launch the ScrewDrivers Printer Discovery application from the Start menu or installation directory.
Step 2: Navigate to the Profiles Tab
Click the Profiles tab in the Printer Discovery application.
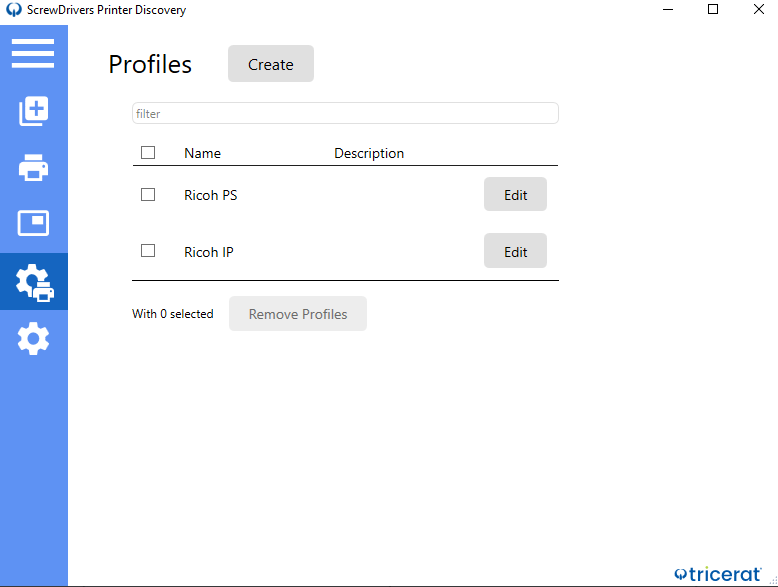
This tab displays all existing printer profiles and provides options to create, edit, or delete profiles.
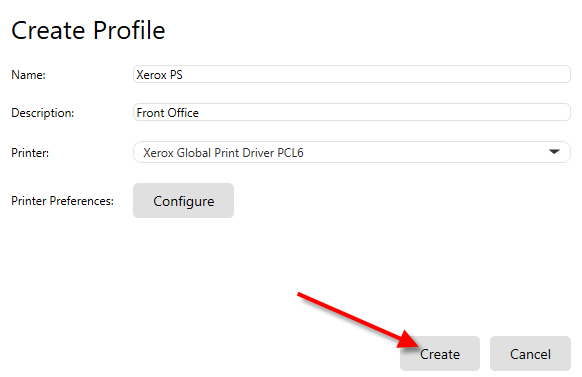
Step 3: Create a New Profile
Click the Create button to begin creating a new printer profile.
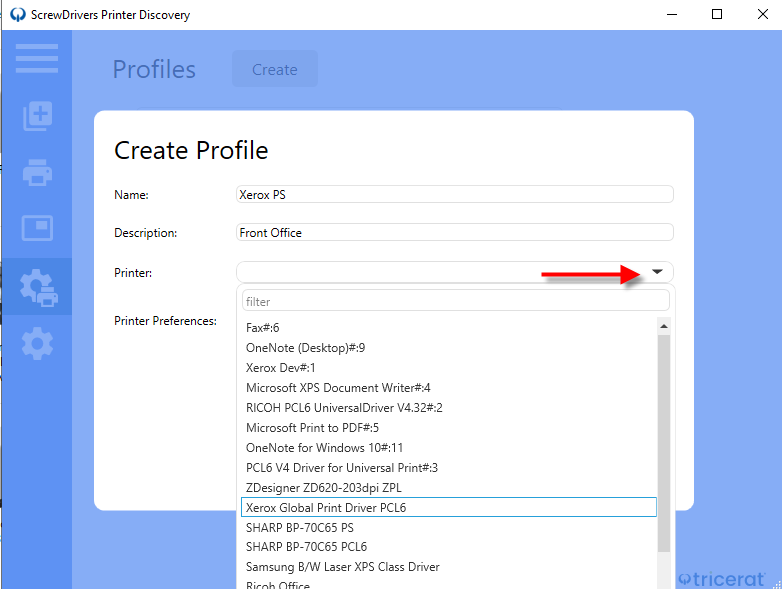
In the profile creation dialog:
- Name: Enter a descriptive name for the profile (e.g., "Double-Sided B&W", "Color Letter", "Legal Simplex")
- Description (optional): Add details about when to use this profile or what settings it contains
- Printer: Use the dropdown to select the printer model this profile applies to
Use clear, descriptive names that indicate the profile's purpose. Good examples:
- "Accounting-Default-Duplex-BW"
- "Marketing-Color-Letterhead"
- "Legal-Simplex-Legal-Size"
Step 4: Configure Profile Settings
Click the Configure button to specify the settings for this profile.
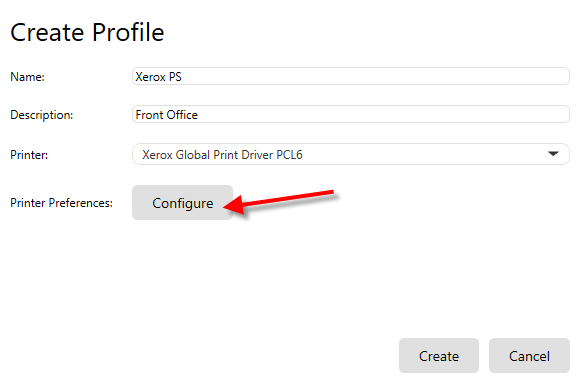
The system will launch the native printer driver configuration interface for the selected printer.
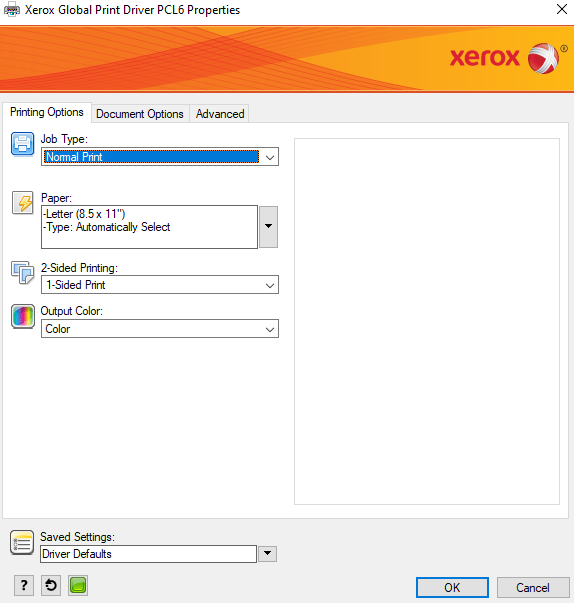
In the native driver interface:
- Configure all desired settings (paper size, orientation, duplex, color mode, finishing options, etc.)
- Navigate through all tabs to set advanced options if needed
- Click OK when finished
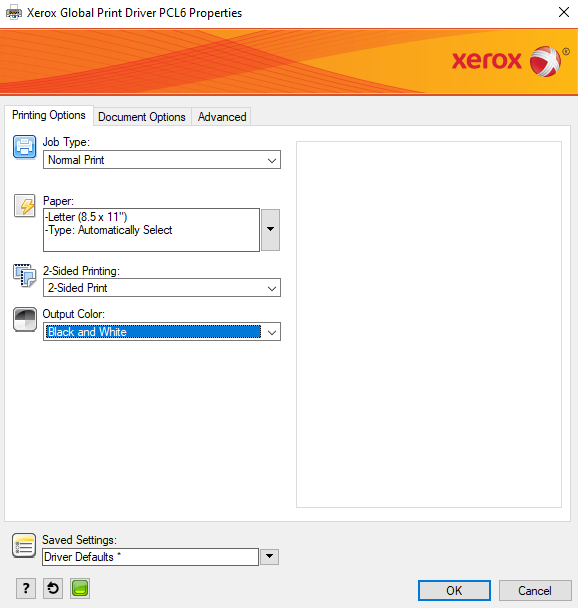
Example Configuration: For this example, the profile is configured with:
- Color Mode: Black and White
- Duplex: 2-sided printing (default)
- Paper Size: Letter
- Quality: Standard
Step 5: Save the Profile
After configuring settings, click Create in the profile dialog to save the profile to the database.
Your new profile now appears in the profiles list.
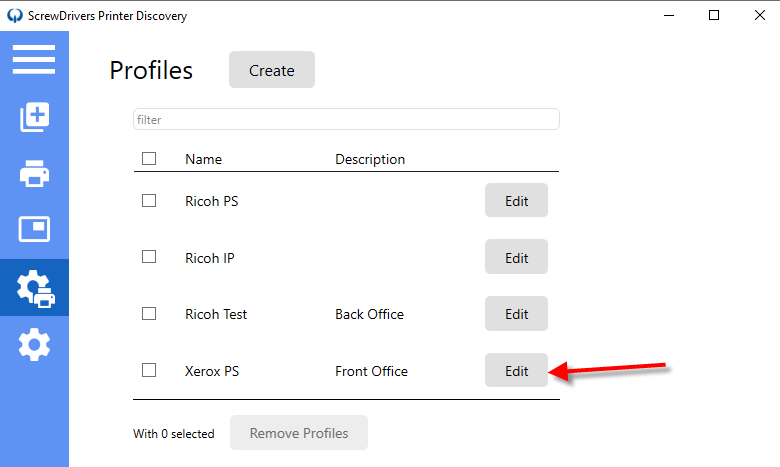
Editing Existing Profiles
You can modify any profile created in this section by:
- Selecting the profile from the list
- Clicking Edit
- Modifying the name, description, or clicking Configure to change settings
- Clicking Save to apply changes
Method 2: Assigning Profiles via ScrewDrivers Administration
Once profiles are created, administrators assign them to printers, Active Directory objects, or custom owners through the ScrewDrivers Administration console.
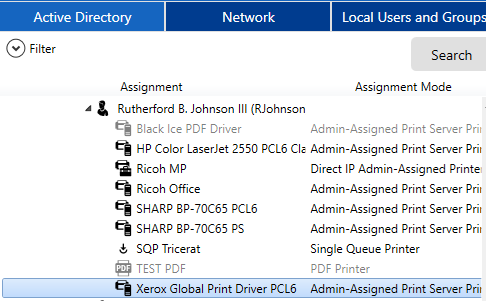
Profile Assignment Priority
Understanding assignment precedence is critical:
Priority Order (highest to lowest):
- User-created profiles (via ScrewDrivers Printers applet) - highest priority
- Active Directory or Custom Owner assignments
- Direct printer assignments - lowest priority
Active Directory and custom owner profile assignments take precedence over direct printer assignments. If you assign a profile to both an AD group and a printer, the AD group assignment will be used.
Assigning Profiles to Printers
You can assign profiles to Print Server printers or Direct IP printers.
Step 1: Open ScrewDrivers Administration
Launch the ScrewDrivers Administration console and navigate to your printer.
Step 2: Select Printer and Assign Profile
Select the printer you want to configure, then access the printer properties or assignment dialog.
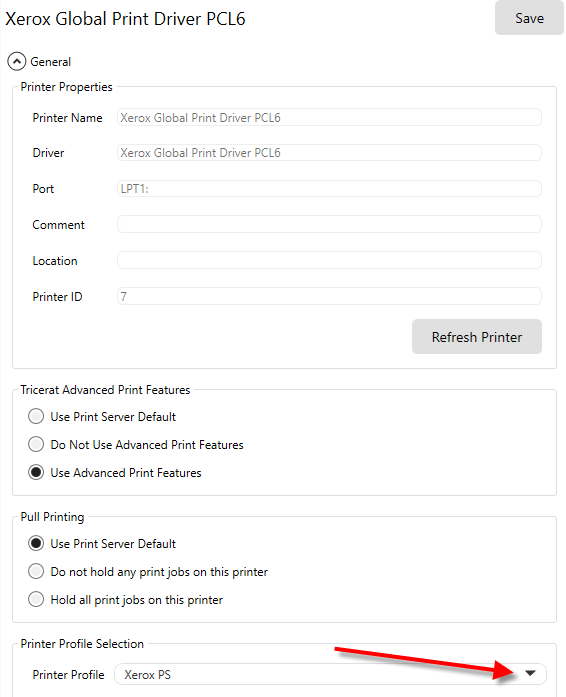
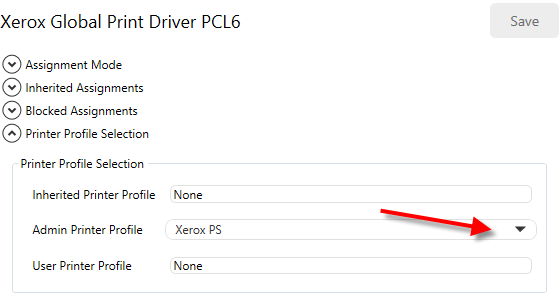
Step 3: Choose Profile from Dropdown
In the printer configuration:
-
Locate the Printer Profile dropdown

-
Select the desired profile from the list
-
Save the assignment
This profile will now be applied when this printer is created for users (unless overridden by AD/Custom Owner or user-created profiles).
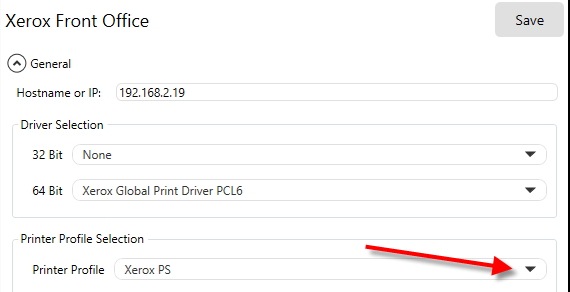
Assigning Profiles to Active Directory Objects
For centralized management, assign profiles to AD groups, OUs, or other directory objects.
Step 1: Select Active Directory Assignment
In the ScrewDrivers Administration console, navigate to the Active Directory section.
Select the AD object (group, OU, user, etc.) you want to configure.
Step 2: Assign Profile to AD Object
Access the printer configuration for that AD object and select a profile from the dropdown.
Any Active Directory or custom owner assignment will take precedence over printer assignments. This allows you to enforce different settings for different departments or user groups.
Profile Application
Once profiles are assigned and saved, they're applied automatically:
- Users log into their session
- ScrewDrivers creates printers based on assignments
- The appropriate profile is applied based on precedence rules
- Printer defaults reflect the profile settings
The printer now shows the configured defaults (e.g., Black and White, 2-sided printing).
Method 3: End-User Created Profiles
If you allow users access to the ScrewDrivers Printers applet, they can create their own personal printer profiles.
User-created profiles take precedence over all other profile assignment types. If a user creates a profile for a printer, it overrides administrator-assigned profiles from AD, custom owners, or direct printer assignments.
Step 1: Open ScrewDrivers Printers Applet
End users launch the ScrewDrivers Printers application from the Start menu or system tray.
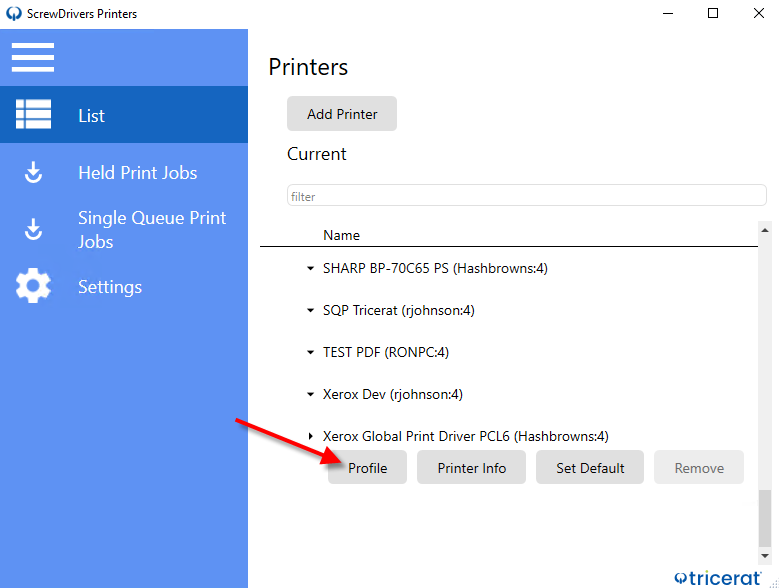
Step 2: Select Printer and Create Profile
- Select the printer to configure
- Click the Profile button
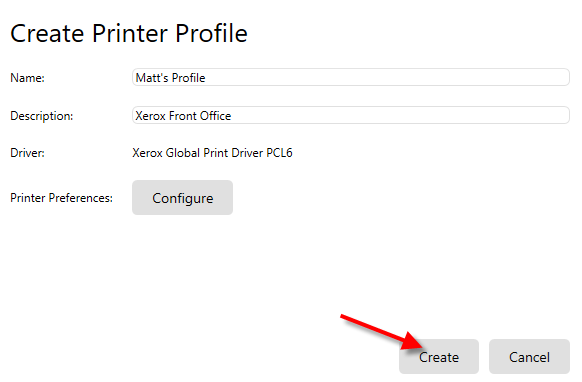
Step 3: Configure User Profile
In the profile creation dialog:
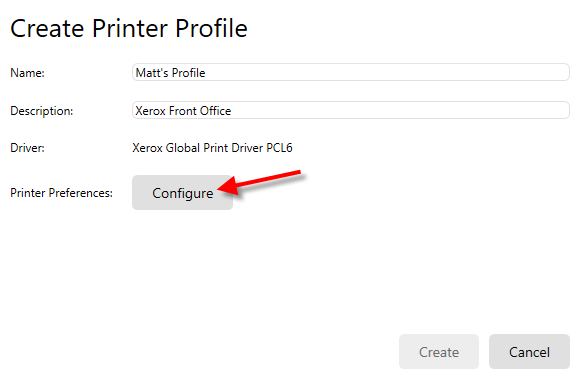
- Enter a Name for the profile
- Optionally add a Description
- Click Configure
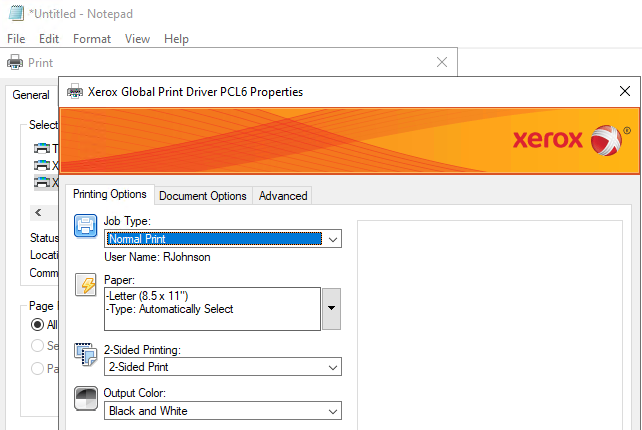
Step 4: Set Driver Preferences
The native driver configuration interface appears.
Users can configure any driver settings they prefer, then click OK.
Step 5: Create and Apply Profile
Click Create to save the profile.
The system prompts the user to refresh their printer queues for the profile to take effect.

Click "Yes" to rebuild the printer queues immediately. The printer will now use the user's custom profile settings.
Managing User-Created Profiles
Users can:
- View their profiles in the ScrewDrivers Printers applet
- Edit existing profiles by selecting them and clicking Edit
- Delete profiles to revert to administrator-assigned defaults
- Create multiple profiles for different use cases, then switch between them
Best Practices
Profile Naming Conventions
Establish clear naming conventions for your organization:
Department-based:
Finance-Default-BW-DuplexMarketing-Color-LetterheadLegal-Legal-Size-Simplex
Purpose-based:
Draft-Economy-BWFinal-Color-HighQualityEnvelope-Simplex
Location-based:
Building1-DefaultHPWarehouse-LabelPrinter
When to Use Each Method
ScrewDrivers Printer Discovery (Admin-created):
- Standardized organizational settings
- Department-specific configurations
- Compliance requirements (e.g., default duplex for sustainability)
ScrewDrivers Administration Assignment:
- Enforcing policies by department (AD groups)
- Location-specific settings (custom owners)
- Printer-specific defaults
End-User Profiles:
- Allow for personal preferences
- Enable self-service customization
- Reduce help desk tickets for print settings
Security Considerations
Control access to profile creation:
Lock down for compliance: If your organization has strict printing policies (e.g., mandatory duplex, mandatory B&W), consider:
- Disabling the ScrewDrivers Printers applet for end users
- Using only AD-assigned profiles
- Implementing application-level restrictions
Enable self-service: For flexibility and reduced help desk load:
- Allow users to create personal profiles
- Provide training on the ScrewDrivers Printers applet
- Monitor for policy compliance
Testing Profiles
Before deploying profiles organization-wide:
- Create a test profile for a common printer model
- Assign to a test user or group
- Verify settings appear correctly in print dialogs
- Test actual printing to ensure output matches expectations
- Check for driver compatibility - some settings may not be supported by all drivers
Troubleshooting
Native Driver Interface Doesn't Appear
Symptom: Clicking "Configure" doesn't show the native driver settings.
Solutions:
- Verify Tricerat Advanced Print Features is enabled
- Check that the printer driver is installed on the Printer Discovery system
- Confirm the driver supports native configuration (some universal drivers have limited UI)
- Check Windows event logs for driver loading errors
Profile Settings Not Applied
Symptom: Printers are created but don't use the configured profile settings.
Solutions:
- Check profile assignment precedence - a higher-priority assignment may be overriding
- Verify the correct driver is being used for the printer
- Refresh printer queues - profiles are applied at printer creation time
- Check for application-specific overrides - some apps may force their own print settings
Users Can't Create Profiles
Symptom: The Profile button is grayed out or missing in ScrewDrivers Printers.
Solutions:
- Verify users have access to the ScrewDrivers Printers applet
- Check permissions in ScrewDrivers Administration
- Ensure Tricerat Advanced Print Features is enabled
- Confirm the printer driver supports profile configuration
Profile Changes Not Reflected
Symptom: Editing a profile doesn't change printer behavior.
Solutions:
- Rebuild printer queues - existing printers retain old settings
- Have users log off and log back in for new profile application
- Delete and recreate the profile if corruption is suspected
- Verify you're editing the correct profile (not a similar-named one)