Managing Objects
Objects are the core resources you manage in ScrewDrivers Administration—printers, session settings, and permissions that you'll assign to users and computers. The Objects pane provides hierarchical organization of these resources, letting you search, create, configure, and organize them into groups for efficient management. This reference details the operations you'll perform on objects and how the console structures them for easy access.
Overview
The Objects pane organizes all available objects by type in a hierarchical tree structure. Each object type (printers, session printer settings, permissions) has its own section, and within those sections you'll find objects sorted alphabetically. The console's dynamic display changes based on which Icon Bar button you click—selecting Printers shows printer objects, selecting Session Printer Settings shows session configurations, and so on.
You can search across all displayed object types simultaneously, create new objects or object groups, and disable objects temporarily without deleting their assignments. The Information pane complements this by displaying detailed configuration forms when you select an object, and showing assignment information when you need to see which owners have access.
Searching for Objects
The search field at the top of the Objects pane lets you quickly locate objects across all currently displayed types. Your search runs against every object shown in the pane—you can't limit it to a single object type. For example, when viewing printer objects, your search covers Print Server objects, Managed Printers, PDF Printers, Local Printers, and Network Printers simultaneously.
The search matches character order exactly but isn't case-sensitive, and your search string can appear anywhere in the object name. Results update dynamically as you type. If you search for "PDF" while viewing printer objects, you'll see both print server printers with "PDF" in their names (like "Microsoft Print to PDF") and all PDF printer objects.
You might need to expand top-level object groups or folders to see all matching results—collapsed groups won't show their nested matches until you open them.
Viewing Object Information
The way you view object information depends on where you select the object:
Selecting in the Objects pane: The Information pane displays the object's configuration form, including all owners currently assigned to this object. The Assignments tab on the form shows a complete list with inheritance information indicating whether each assignment came directly or inherited from a parent owner.
Selecting in the Assignments pane: The Information pane shows assignment status details—whether the assignment is inherited, blocked, or direct. A "View Object Properties" option appears that switches the Information pane to display the object's configuration instead of assignment status. Clicking this option automatically clears the Assignments pane selection and highlights the object in the Objects pane.
Creating and Managing Objects
When you add new objects using the "Add Object" button at the top of the Objects pane, the system automatically selects the appropriate folder level in the Objects tree. You can also manually right-click folders to add objects, but this option appears only at the lowest levels where it's appropriate to create new objects or groups.
For example, when viewing printer objects, you can't add objects at the printer type folder level (Print Servers, Managed Printers), but you can add them within specific folders like the Print Server folder itself.
Adding New Objects
Right-clicking an appropriate folder opens a context menu with these options:
- New Object: Opens an Add dialog with all necessary fields for creating the new object, including its name
- New Group: Creates an object group for organizing related objects
If a folder supports only object creation (not groups), you'll see only the New Object option.
Creating Object Groups
Object groups provide logical collections of similar objects, making it easier to assign multiple related objects simultaneously. When you create a group, you'll give it a descriptive name and can then add existing objects to it or create new objects directly within the group.
Groups appear in the Objects tree with a distinctive icon, and you can nest objects within them for organized hierarchies. Assigning a group to an owner automatically assigns all objects within that group, streamlining bulk assignments.
Disabling Objects
You can temporarily disable objects without removing them from the Objects tree or deleting their assignments. Disabled objects become non-operational for all owners to which they're assigned, but all assignment relationships remain intact.
This is useful when you need to take a printer down for maintenance but don't want to recreate all assignments when it returns to service. Although the printer assignments persist in the database, users won't receive the printer until you re-enable it.
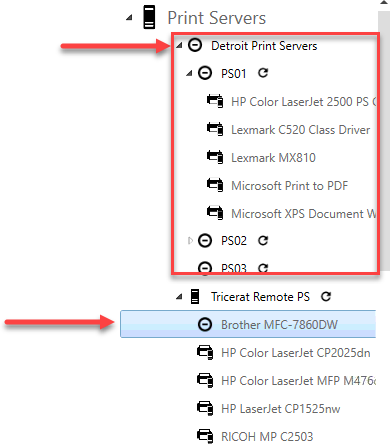
Figure: Disabled objects in the tree - (1) All objects in a group disabled at the group level, (2) Individual object disabled
You can disable objects either individually or at the group level. Group-level disabling affects all objects within the group while maintaining their individual enabled/disabled states—when you re-enable the group, objects return to their previous individual states.
Viewing All Owners for an Object
The Assignments tab on an object's form in the Information pane displays every owner currently assigned to that object. This view shows both direct assignments (made explicitly) and inherited assignments (received through the ownership hierarchy).
For each owner, the tab indicates:
- The owner name and type
- Whether the assignment is direct or inherited
- If inherited, from which parent owner
- The assignment status (allowed or denied)
You can delete direct assignments from this tab by selecting them and clicking Remove. Inherited assignments can't be deleted here—you must modify the assignment at the parent owner level.
To view all owners assigned to a single object:
- Set the Objects pane to the correct display (click the appropriate Icon Bar button)
- Search for and select the specific object
- Open the Assignments tab in the Information pane
The complete owner list appears with inheritance details. For reports showing all owners across all objects in your database, use the Reporting view described in the Reports Reference.
Searching Within Assignment Lists
The Assignments tab includes its own search field that filters the displayed owners as you type. This search updates dynamically, helping you quickly find specific owners within large assignment lists. For example, searching for "Sales" might return "Sales Demo" and "NE Sales Region" if both are assigned to the selected object.
Object Organization Best Practices
Effective object organization improves management efficiency:
- Use descriptive names: Make object names searchable and meaningful ("Finance-HP-Color" vs "Printer42")
- Group related objects: Cluster objects that are typically assigned together
- Maintain naming conventions: Consistent patterns help with searching and bulk management
- Disable rather than delete: Preserve assignments by disabling temporarily instead of deleting
Related Resources
- Previous: Entities and Inheritance - How assignments inherit through hierarchies
- Next: Managing Owners - Working with users, groups, and computers
- Reference: Managing Assignments - Creating and modifying assignments
- Reference: Reports Reference - Generating assignment reports
- Tool: Icon Bar Reference - Accessing object displays